 |  |  |  |  |
 |  |  |  |  |
 |  |  |  |  |
Sunday, April 25, 2010
Impressions of Europe
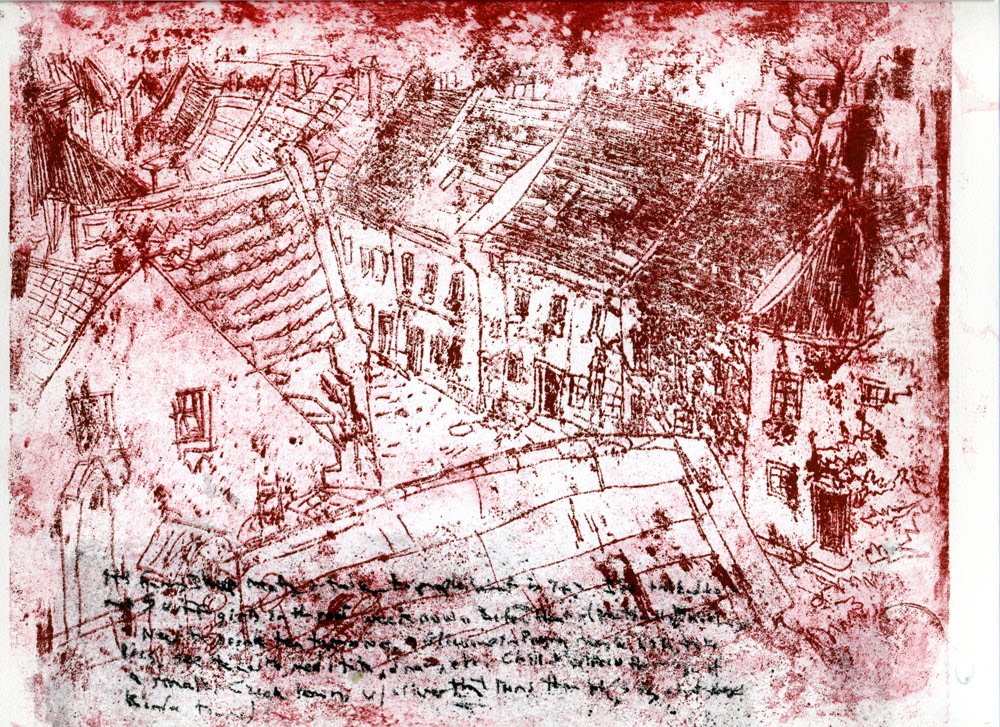
Here are the pieces from my "Impressions of Europe" show that just closed at the UAG.

Saturday, April 10, 2010
ConTEXT show
 |  |  |
The ConTEXT show opened at the UAG on Friday, April 2 and was a great success. Thanks to all the people and friends who showed up!
The show runs until April 23.
Upstate Artists Guild
247 Lark Street
Albany NY 12210
Gallery Hours
Thurs/Fri 5:30-8 pm
Sat 2-8 pm
Sun 2-6 pm
Sunday, March 14, 2010
How to do Paper Plate Lithography
What is paper plate lithography? It is a form of printmaking where you take a laserprint photocopy (xerox) of an image as the basis for a lithograph. Gum arabic is placed on the photocopy. When you ink the copy, the gum arabic repels the ink from the white spots while the ink adheres to the photocopy parts.
What do you need?
1) After you have your laser print copies, shellac the back of each copy. This is done to give the paper more strength when you're inking it and dousing it in gum arabic. This step is not necessary but it will make your life a little easier.

2) After the shellac dries, turn the copy over to the printed side. Use gum arabic to cover the entire image. This will make the paper repel the ink later.

3) Take a damp sponge and wipe off / even out the gum arabic.

4) You're ready to ink it. Put on your gloves at this time. It gets messy. Take some ink out with a palette knife and place it on a workspace. Work the ink some to get it a nice consistency. Use a drop or two of burnt plate oil if it's too tacky. Next, use your roller and get a nice even coat of ink on in. Now roll your image. Cover all the photocopied parts; if there are white parts it's not necessary to ink these.

5) This is one of the most important steps. Using a sponge, remove the excess ink. Now, the easiest way to do this is to get your sponge really wet. Drop a few drops of water on the ink. Watch how the ink disippates; it's like oil and water mixing. Use the sponge to sop up the excess ink and rinse it out / douse it in a bucket of water often.

6) After all the excess ink is gone, you should notice the ink sticking to your image. If you don't, you might now have enough ink on it. Maybe you wiped off the ink or didn't do it right. You can roll it again or take your chances.

7) Take your printing paper and put it on your work surface. Sometimes it helps for your to have dampened the paper ahead of time and let it dry some. This is optional. Put your inked paper face down on the paper.

8) Take a rolling pin and roll the back of the paper. Initially I had a piece of paper over the inked paper to minimize mess, but it doesn't seem to work as well as rolling directly on the paper.

9) Now peel your (de)inked paper plate off the printing paper. Hopefully your print came out okay. If not, you might be able to make another pass with the same plate (or better yet a fresh one). This can create a neat effect if you do it correct. Just make sure to line up the plate correctly the second time. Good luck!

Special thanks to my former professor Rachel Gross who taught me this process initially, Central Art Supply for all my art supply needs, and Scott Pernicka for letting me use his laserprinter.
What do you need?
- Laser print copy (reversed)
- Shellac - optional
- Gum arabic
- Oil based Etching ink
- Roller
- Rolling pin - for the DIYers
- Disposable gloves
- Sponge
- Crappy brushes
- Printing surface - plexiglass works
- Burnt plate oil - for thinning out the ink (optional)
- Printing paper - Rivers BFK
- Baby oil - ink clean up
1) After you have your laser print copies, shellac the back of each copy. This is done to give the paper more strength when you're inking it and dousing it in gum arabic. This step is not necessary but it will make your life a little easier.

2) After the shellac dries, turn the copy over to the printed side. Use gum arabic to cover the entire image. This will make the paper repel the ink later.

3) Take a damp sponge and wipe off / even out the gum arabic.

4) You're ready to ink it. Put on your gloves at this time. It gets messy. Take some ink out with a palette knife and place it on a workspace. Work the ink some to get it a nice consistency. Use a drop or two of burnt plate oil if it's too tacky. Next, use your roller and get a nice even coat of ink on in. Now roll your image. Cover all the photocopied parts; if there are white parts it's not necessary to ink these.

5) This is one of the most important steps. Using a sponge, remove the excess ink. Now, the easiest way to do this is to get your sponge really wet. Drop a few drops of water on the ink. Watch how the ink disippates; it's like oil and water mixing. Use the sponge to sop up the excess ink and rinse it out / douse it in a bucket of water often.

6) After all the excess ink is gone, you should notice the ink sticking to your image. If you don't, you might now have enough ink on it. Maybe you wiped off the ink or didn't do it right. You can roll it again or take your chances.

7) Take your printing paper and put it on your work surface. Sometimes it helps for your to have dampened the paper ahead of time and let it dry some. This is optional. Put your inked paper face down on the paper.

8) Take a rolling pin and roll the back of the paper. Initially I had a piece of paper over the inked paper to minimize mess, but it doesn't seem to work as well as rolling directly on the paper.

9) Now peel your (de)inked paper plate off the printing paper. Hopefully your print came out okay. If not, you might be able to make another pass with the same plate (or better yet a fresh one). This can create a neat effect if you do it correct. Just make sure to line up the plate correctly the second time. Good luck!

Special thanks to my former professor Rachel Gross who taught me this process initially, Central Art Supply for all my art supply needs, and Scott Pernicka for letting me use his laserprinter.
Monday, February 8, 2010
Paper lithography

I'm working on art for an upcoming show and am trying printmaking again after a ten year break. This is a proof of concept trying out the technique of paper lithography, using oil based etching ink, gum arabic, and a photocopy. It turned out pretty good and I learned what not to do the next time.
Tuesday, December 8, 2009
Geppi Entertainment Museum: pop culture mecca
Every pop culture fan deserves to visit the Geppi Entertainment Museum in Baltimore. Filled with all kinds of entertainment, from comics, to tv, to toys, it's a treat for people of all ages. If you're a comic fan, you'll marvel at all the rare comics displayed, including all of the milestone comics like Marvel Comics #1, Action comics #1, and Detective comics #27.

If you're more a toy fan, you'll no doubt find plenty to salivate over as well. Whether it's MOC Transformers, G.I. Joe, or Star Wars, there's plenty to see.

Notable for Joe fans is the 1963 12" Joe prototype. Yes! This one!

The museum runs the gamut from tin toys to I Love Lucy to animation cells. No item is seemingly too random and half the fun is discovering what lies in the next room. Where else could you find a box of Mr. T cereal on display? Check it our if you're in Baltimore, or make the trip if you're close by. It's definitely worth it.


If you're more a toy fan, you'll no doubt find plenty to salivate over as well. Whether it's MOC Transformers, G.I. Joe, or Star Wars, there's plenty to see.

Notable for Joe fans is the 1963 12" Joe prototype. Yes! This one!

The museum runs the gamut from tin toys to I Love Lucy to animation cells. No item is seemingly too random and half the fun is discovering what lies in the next room. Where else could you find a box of Mr. T cereal on display? Check it our if you're in Baltimore, or make the trip if you're close by. It's definitely worth it.

Saturday, December 5, 2009
My Joe Collection (part 1)
Thought I'd post pics of my Joe collection. This was the set up in my apartment circa early 2006.
MOC Joes, G1 Transformers keychains, some of my brother's original Joes

Army builders: Urban, Cobra infantry, Funskool Night Creepers, (modified) Vipers, Crimson Army (custom Tomax and Xamot). Defiant Shuttle (my mom got it for $10 at a garage sale years ago)

Top: Hydrofoil, Cobra Command, Oktober Guard
Top shelf: Techno Vipers, Alley Vipers, Ninjas, Classic Team
2nd shelf: JvC, Bugg and some Cobras
3rd shelf: BATs and Grenadiers
4th shelf: Arctic teams
5th shelf: Dreadnoks and ninjas
6th shelf: RAH Joes
7th shelf: Cobras
Bottom shelf: Some Vehicles, Tiger Force (Roadblock and Airtight customs)

MOC Joes, G1 Transformers keychains, some of my brother's original Joes

Army builders: Urban, Cobra infantry, Funskool Night Creepers, (modified) Vipers, Crimson Army (custom Tomax and Xamot). Defiant Shuttle (my mom got it for $10 at a garage sale years ago)

Top: Hydrofoil, Cobra Command, Oktober Guard
Top shelf: Techno Vipers, Alley Vipers, Ninjas, Classic Team
2nd shelf: JvC, Bugg and some Cobras
3rd shelf: BATs and Grenadiers
4th shelf: Arctic teams
5th shelf: Dreadnoks and ninjas
6th shelf: RAH Joes
7th shelf: Cobras
Bottom shelf: Some Vehicles, Tiger Force (Roadblock and Airtight customs)

Friday, November 6, 2009
Tofu Quilt

My mom's new book, Tofu Quilt is available for sale on Amazon. (The cover was done by my dad.) It's a free verse book about her life growing up in China and Hong Kong. I'm reading it now and it's really funny and heartfelt. The short chapters make it easy to read a few poems a night. Check it out!
Subscribe to:
Posts (Atom)
